By Alex Kozora
Breakdown of the snaps played by Pittsburgh Steelers tackle Kelvin Beachum versus the Cincinnati Bengals.
CLICK ON ANY PICTURE TO ENLARGE
First Drive
Snaps: 6
Run/Pass: 4/2
Play-by-Play
1. 1st and 10, 15:00 1st. Left tackle. Screen away from him. Unsuccessful cut block on Michael Johnson.
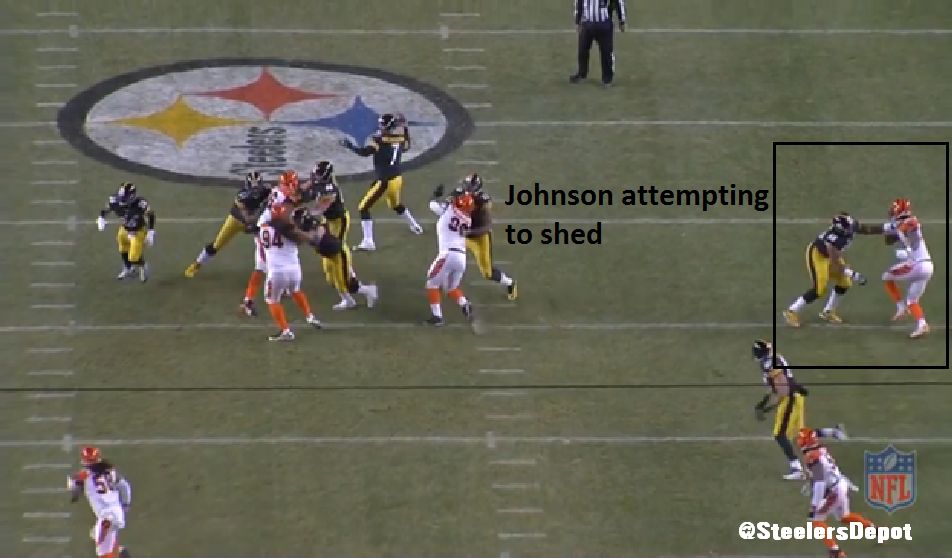
2. 1st and 10, 14:46. Base block against the RE. Run to the right side, away from Beachum. Johnson sheds him with a swim but doesn’t factor in on the play.
3. 2nd and 7, 14:14. Smoke screen to Antonio Brown. Beachum on run block as part of the team’s packaged plays that give Ben Roethlisberger a run/pass option.
4. 1st and 10, 13:47. Base end on the backside run. Again, Johnson able to shed but to the outside and doesn’t impact the run.
5. 2nd and 6, 13:12. Draw play. Johnson rush to the inside. Beachum gets his hands into the end’s pads and moves laterally with him. Beachum is the low man and washed him out of the play with Le’Veon Bell bouncing to the outside.
6. 3rd and 4, 12:33. Toss to the right. Looks around to find a defender to tango with but can’t find a partner. Just like me at prom…
Second Drive
Snaps: 2
Run/Pass: 2/0
Play-by-Play
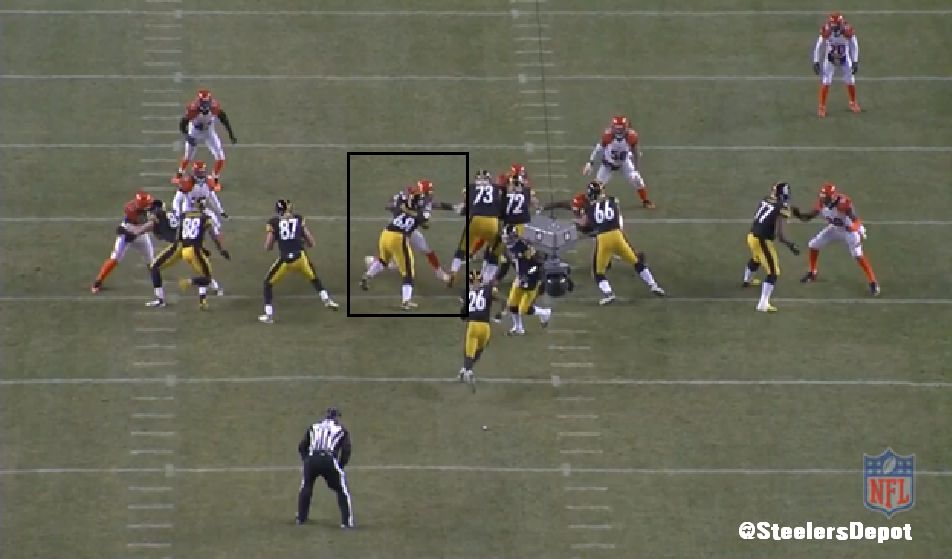
1. 1st and Goal, 10:40 1st. Combo block on the 3 tech with Ramon Foster. LG moves to LB. Double-team gets the tackle turned and Beachum able to seal him.
2. 2nd and Goal, 10:03. Run to the offenses right. Successful cut block on the DT. TD.
Third Drive
Snaps: 8
Run/Pass: 3/5
Play-by-Play
1. 1st and 10, 6:35 1st. Bullrush from Johnson. Anchors and absorbs it well and then works the end upfield. Good sequence.
2. 2nd and 1, 6:08. Dive up the middle. Base block on Johnson who jolts the LT and disengages. Again though, no factor on the play.
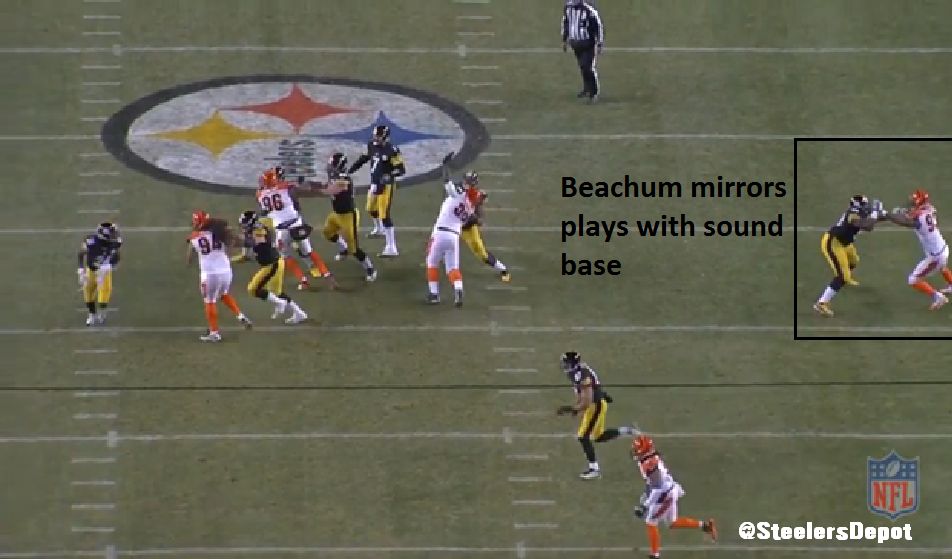
3. 1st and 10, 5:29. Stymies Johnson in pass pro. Gets his arms extended and into the chest of the end. Mirrors with him when Johnson attempts to shed. Good lateral movement from Beachum.
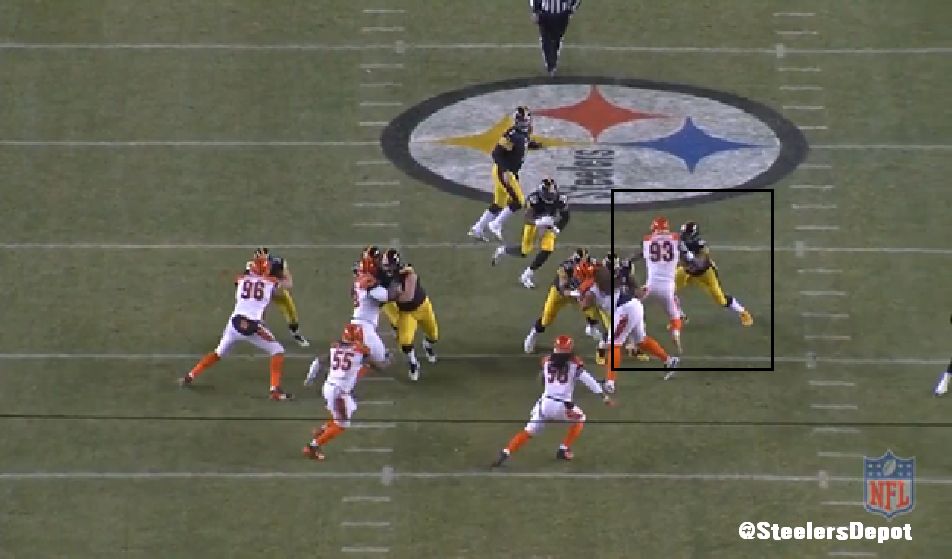
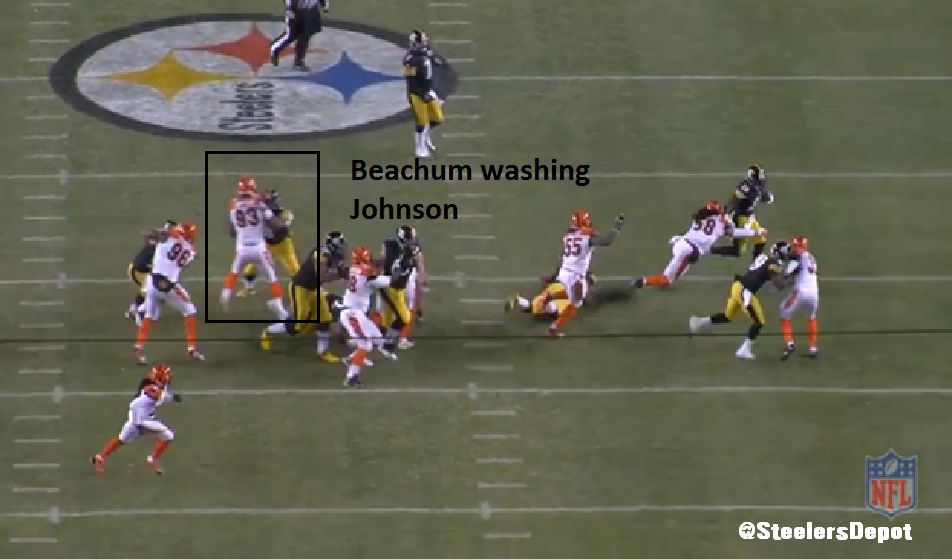
4. 2nd and 6, 4:51. Zone block. Conflicted to what his assignment could be. Either to work to the LB or base the end. On the tape, looks like it’s to base the end. But zone blocking rules would tell you it’d be to combo the DE with Matt Spaeth (who ends up working to the LB) and Beachum moves to the second level.
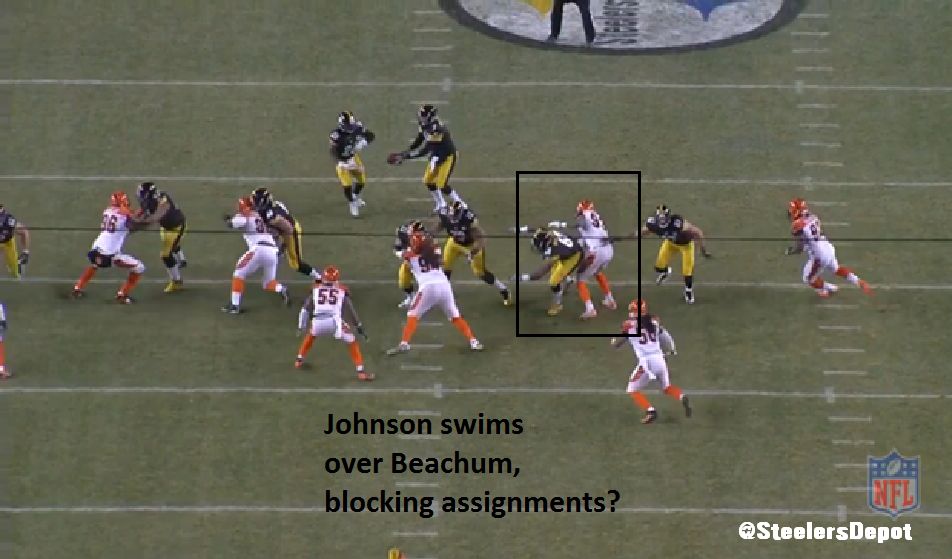
Regardless, Johnson swims over him off the snap. Falling forward, Beachum lands awkwardly on his right knee on this step.
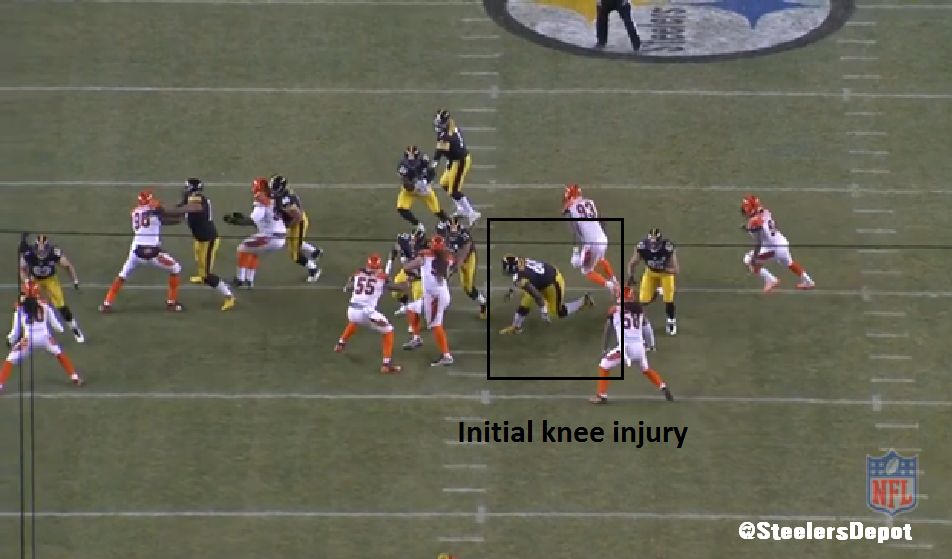
Limps around but remains in the game.
5. 3rd and 6, 4:16. Shovel pass to Jerricho Cotchery. Not much to report though moved around without a hitch.
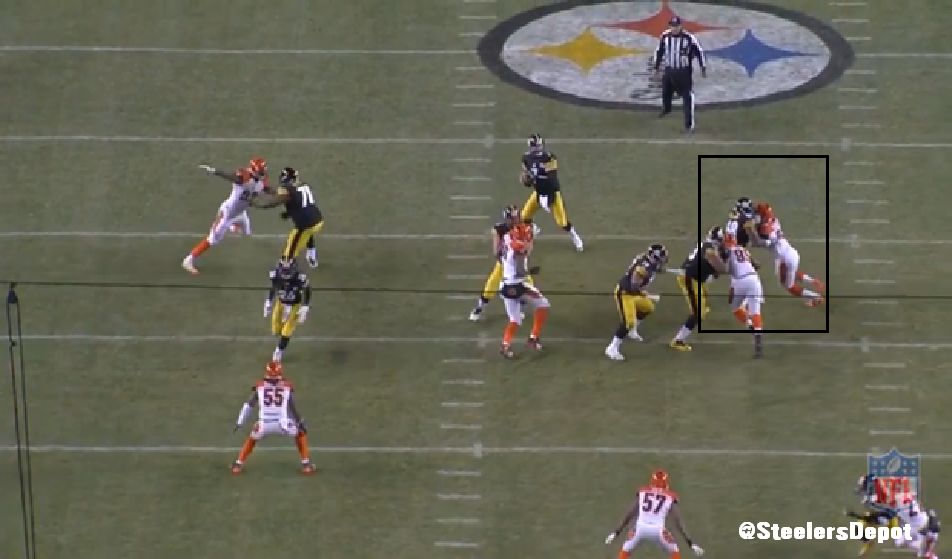
6. 4th and 3, 3:32. Pass pro against James Harrison. Doesn’t let him dip around the edge like Deebo loves to do. Stays with him laterally almost the whole way. Impressive play.

7. 1st and 10, 3:05. Fold block I mentioned in my game breakdown (shameless plug, go check it out). On second look, worked better than I thought. Beachum seals Rey Maualuga to the inside.
8. 2nd and 8, 2:24. Two man rush. Pushes Johnson around for the first half of the play. Not much else to note aside from the TD pass to Brown.
Fourth Drive
Snaps: 10
Run/Pass: 2/8
Play-by-Play
1. 1st and 10, 14:31 2nd. Attempted cut block. Not pretty but effective, bringing the end to the ground.
2. 1st and 10, 14:04. Packaged play. Ben decides to hit AB on screen. Inside zone blocking scheme.
3. 2nd and 10, 13:22. Overload to the blitz to his side. Picks up correct defender and keeps him at bay. Pressure allowed on the play not his fault.
4. 1st and 10, 12:37. Pass protection. Ball comes out quick on a hot read by Ben.
5. 2nd and 1, 11:59. Another zone block. Beachum reaches second level but the flow is away from him so there isn’t a defender in the area.
6. 1st and 10, 11:26. Defensive end does slant to the inside but great seal to the inside. Opens up the running lane and Bell goes for an eight yard gain.

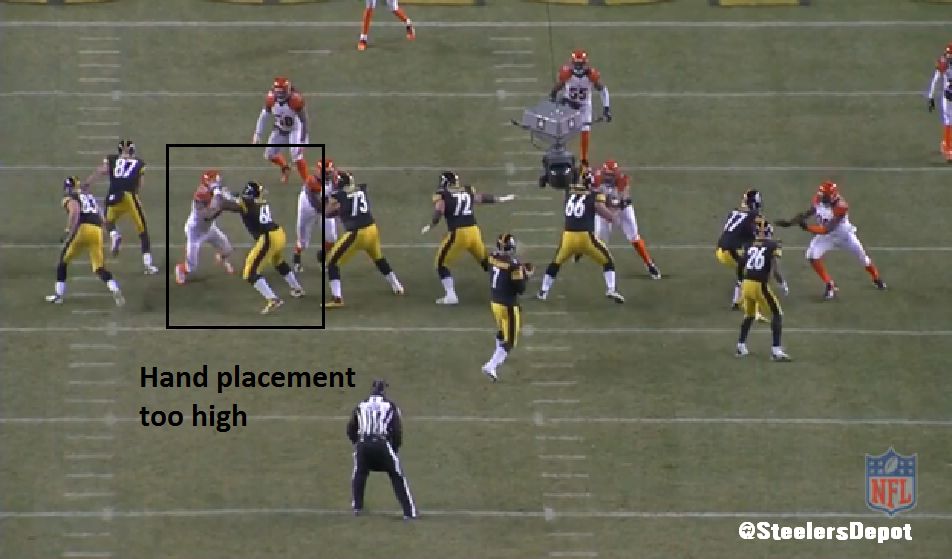
7. 2nd and 2, 10:55. Pass protection. Hand placement too high here initially. Doesn’t get beat though.
8. 1st and Goal, 10:30. Pass pro. Mirrors well vs Johnson who tries to rush inside initially and then back out as Ben moves to his left.
9. 2nd and Goal, 10:24. Bubble screen. Good cut block on the defensive tackle.
10. 3rd and Goal, 9:44. Pass pro. Ugly here. Base is too wide reacting to Johnson’s stutter step to the inside. No power and reverse pancaked to the ground.

Fifth Drive
Snaps: 9
Run/Pass: 7/2
Play-by-Play
1. 1st and 10, 5:06 2nd. Second level on run to the safety in the box. Run is away from him.
2. 2nd and 9, 4:27. Down block against the DT. Sticks with him until he gets slapped across the helmet.
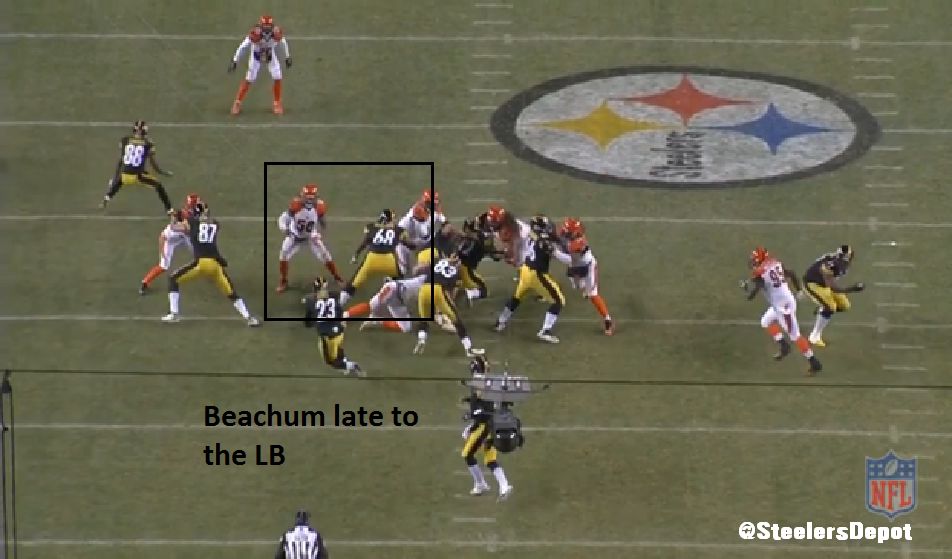
3. 1st and 10, 3:54. Beachum is greedy here and late getting to the LB after chipping the DT. Felix Jones forced to bounce the run to the edge.
4. 2nd and 6, 3:21. Doesn’t handle the bull rush from Johnson as well as the first one. Walked back into the pocket.
5. 1st and 10, 2:49. Run to the playside “A” gap. Unsuccessful cut of Michael Johnson.
6. 2nd and 5, 2:14. Toss to the right. Beachum runs gingerly down the line. Knee clearly bothering him. Cut block on the play before likely re-aggravated it.
7. 1st and 10, 2:00. Combo block. While working to the second level, gets his right knee partially rolled into from behind. Again, pulls up lame.
8. 2nd and 6, 1:31. Again, doubles the end and then works to the ‘backer. Able to get there this time but some trouble sticking.
9. 3rd and 5, 1:21. Cut block that fails.
Sixth Drive
Snaps: 3
Run/Pass: 1/2
Play-by-Play
1. 1st and 10, 13:33 3rd. Unable to get square to the linebacker at the next level on this run.
2. 1st and 20, 13:12. Beachum does a fine job in pass protection but the defender is also seeing/defending the screen to Bell, trying to knock it down.
3. 2nd and 4, 12:32. Doubles DT in pass protection with Ramon Foster.
Seventh Drive>
Snaps:
Run/Pass: 2/0
Play-by-Play
1. 1st and 10, 10:37 3rd. Run block. Not a lot of power on contact, doesn’t win the POA. Gets turned and winds up on the ground. Carlos Dunlap and Spaeth come crashing down on his knee and Beachum is forced from the game for a few snaps.
2. 3rd and 6, 7:27. Beachum returns on the same drive. Falls off his block against Johnson.
Eighth Drive
Snaps: 6
Run/Pass: 2/4
Play-by-Play
1. 1st and 10, 14:08 4th. Screen to AB away from Beachum. Gets downfield but no one in the area with the throw away from him.
2. 2nd and 9, 13:43. Zone block. Doubling with Spaeth down the line.
3. 3rd and 6, 12:56. T/E stunt he picks up fine.
4. 1st and 10, 12:15. Failed a cut block.
5. 2nd and 9, 11:40. Not a stunt but Johnson eventually loops inside. Beachum stays with it the best he can. No pressure on the play.
6. 3rd and 11, 10:46. Stonewalls Johnson this time. Sack allowed comes from the other side off a missed T/E stunt.
Ninth Drive
Snaps: 6
Run/Pass: 5/1
Play-by-Play
1. 1st and 10, 5:46 4th. Base block against Johnson. On this run, blocks it well. End can’t shed until very late.
2. 2nd and 4, 5:42. Not as good of a run block here. End swims over the top, Beachum lunges and falls.
3. 3rd and 4, 5:38. Pass pro. Ball comes out quick on the curl to Emmanuel Sanders.
4. 1st and 10, 4:55. Good pad level and gets his hands into the chest of Johnson on this run.
5. 2nd and 10, 4:51. Zone block. Solo against Michael Johnson down the line.
6. 3rd and 4, 4:07. Johnson sheds Beachum and nearly makes the tackle.
Tenth Drive
Snaps: 4
Run/Pass: 4/0
Play-by-Play
1. 1st and 10, 2:36 4th. Inside zone to the left. Whiffs at second level bt not his fault. Jonathan Dwyer cuts back so the LB changes directions with him right as Beachum attempts to engage.
2. 2nd and 2, 2:00. Gets just enough of a push on a linebacker filling the gap after initially doubling the DE.
3. 3rd and 2, 1:19. Solo block vs Johnson who tosses him aside and makes the tackle.
4. 4th and 2, :33. Doubled the end and them pushes the filling linebacker.
Total/Conclusions
Snaps: 56
Run/Pass: 32/24
Despite Michael Johnson having a down year (3 sacks I 2013 after an 11.5 sack 2012 campaign) he still poses a difficult matchup. A defensive end that has a lot of length and plus athleticism can be a headache. Johnson won his fair share of battles, especially in the second half but Beachum’s knee problems are a partial explanation.
In pass protection, Beachum did a fantastic job against him, rarely getting help in pass pro from tight ends, running backs, or even Foster. He played with his butt down and did a nice job laterally.
These annoying injuries are setting Beachum back a little bit but he’s battled through them and still been productive. To quote Mike Tomlin, the arrow is pointing up.