By Alex Kozora
Breakdown of the 21 snaps played by Pittsburgh Steelers linebacker Jarvis Jones against the Miami Dolphins.
CLICK ANY PICTURE TO ENLARGE
First Drive
Snaps: 7
Run: 3
Rush/Drop: 4/0
Play-by-Play
1. 1st and 10, 4:15 1st. Working against TE Michael Egnew. Gets into his pads and is able to shed but pushed upfield just enough that he can’t get to Ryan Tannehill.
2. 2nd and 10, 4:07. Zone run that LaMarr Miller cuts back, away from Jones. Pancaked by rookie tight end Dion Sims. To be fair, Sims is 265 pounds but you never want to see your defender on the ground early in the play.
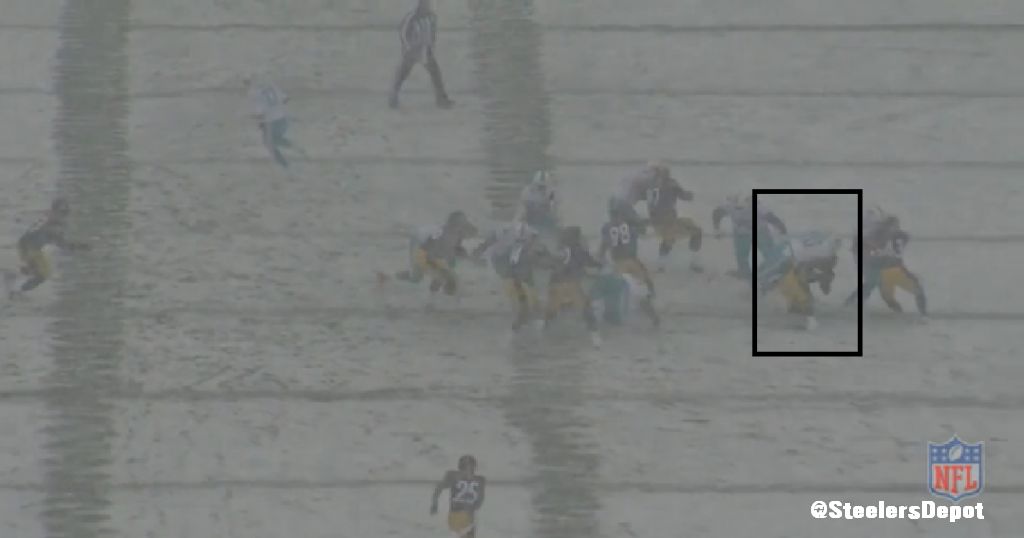
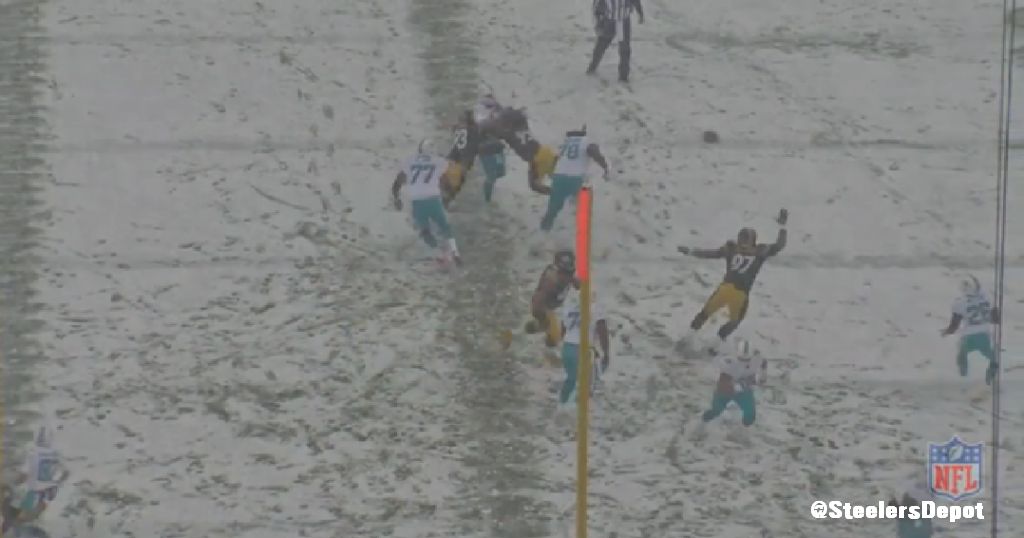
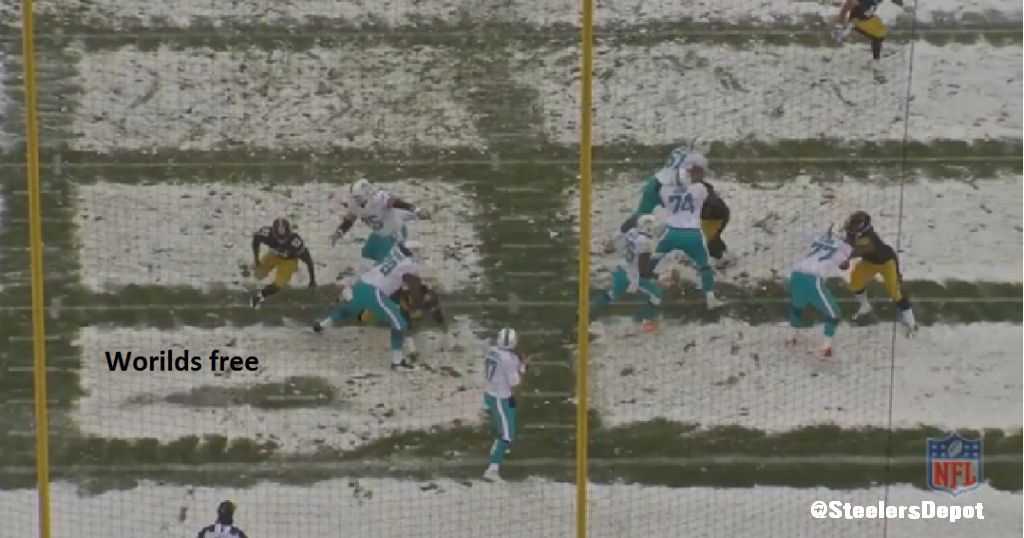
3. 3rd and 3, 3:25. Rushes. Showed this in my game breakdown. Pushed way up the arc, giving room for Tannehill to scramble for a first down.
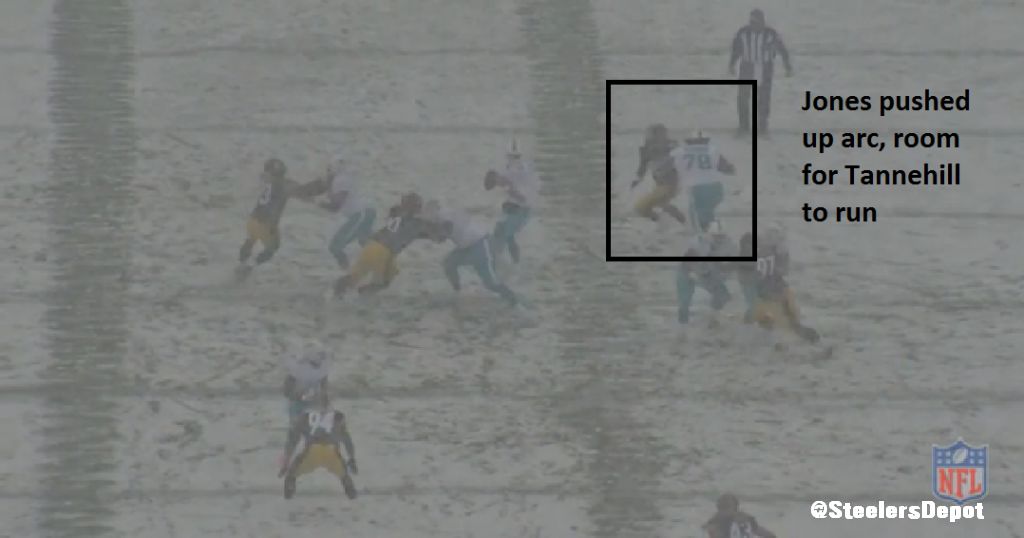
At a point, needs to stop his momentum and work back to the inside like Jason Worilds does. Gives you a better chance to get the quarterback and squeezes the pocket, not allowing him to leak out.
4. 1st and 10, 2:52. 48 yard run by Tannehill. As has been discussed, not the fault of Jones who plays his dive responsibility. Likely the fault of Will Allen for not containing.
5. 1st an 10, 2:15. Able to slip past the waist-bending Bryant McKinnie. Good work vs the lumbering left tackle.
6. 2nd and 10, 2:10. Pushed back twice by McKinnie on this run. Example of needing to get stronger.
7. 2nd and 9, 1:32. Screen by Miami but McKinnie still in pass protection so the block isn’t much different. Important part of the play is Jones getting his hands on McKinnie first.
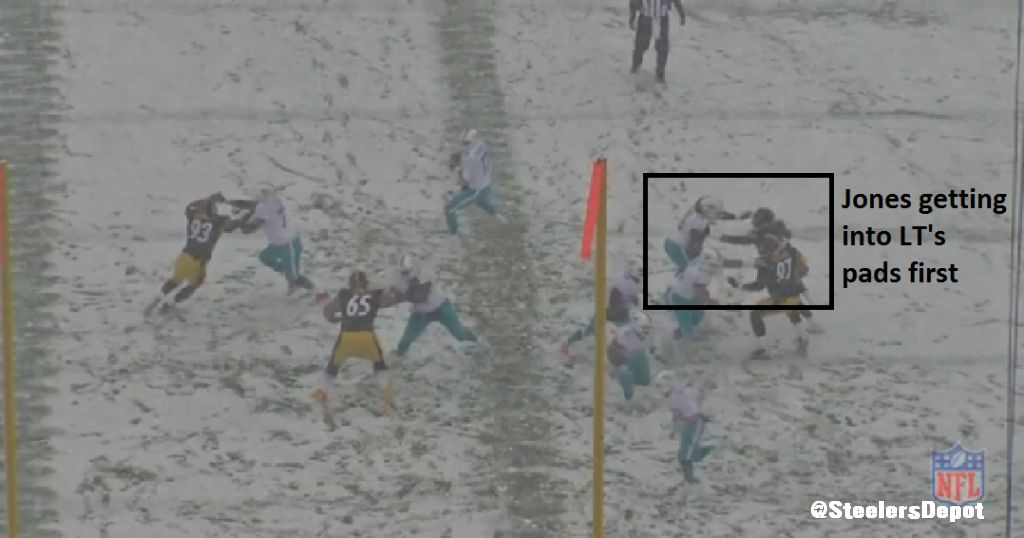
And then he’s able to stay disengaged from him. Can’t get locked up because once McKinnie gets his hooks on you, the battle is over. Meets Jason Worilds at the quarterback, sandwiching him.
Second Drive
Snaps: 1
Run: 0
Rush/Drop: 1/0
Play-by-Play
1. 3rd and 17, 12:32 2nd. ROLB for just a play on 3rd and long. Ball out quick. Jones slips off the snap so not much happening on this play.
Third Drive
Snaps: 5
Run: 2
Rush/Drop: 2/1
Play-by-Play
1. 1st and 10, 4:42 2nd. Run to the right side. Jones free on the backside. Chips on the tackle.
2. 3rd and 9, 4:07. Draw. Sheds the block of McKinnie. Barely stays in the picture.
3. 2nd and 19, 3:39. ILB. Drops into coverage, reading Tannehill. QB scrambles and Jones forces him out of bounds after a 20 yard pickup. Called back due to holding.
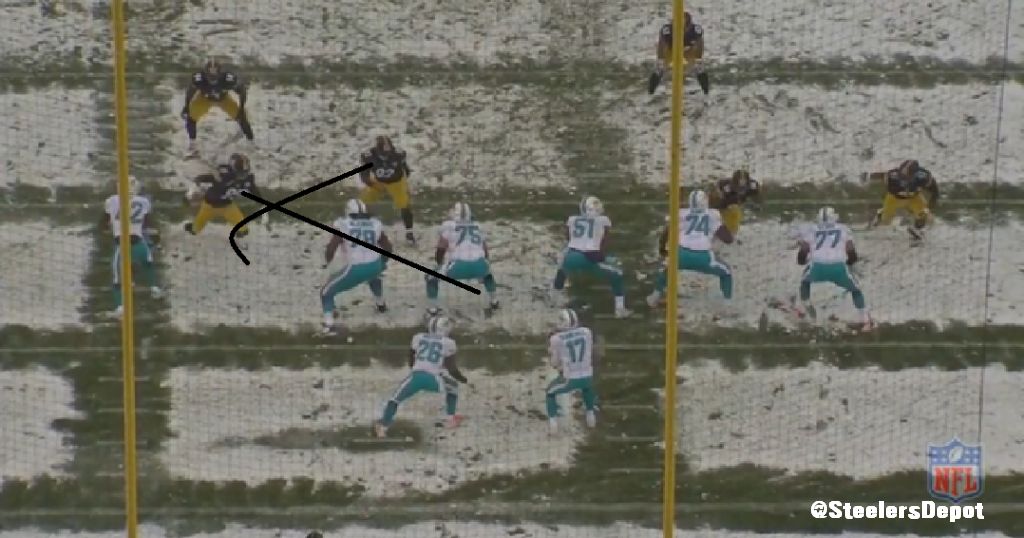
4. 2nd and 26, 3:17. ROLB. Worilds stacked on same side, stunts with him. Slants hard to the inside of the left tackle to draw him away. Falls down in the process but does his job, letting Worilds loop around and rush free.
5. 3rd and 13, 2:36. Unable to get enough bend around the edge and McKinnie, who has doubled over. But the left tackle still strong enough to push him off-balanced and upfield.

Example of needing better bend and more strength. Have to beat tackles that are playing with poor technique.
Fourth Drive
Snaps: 3
Run: 0
Rush/Drop: 3/0
Play-by-Play
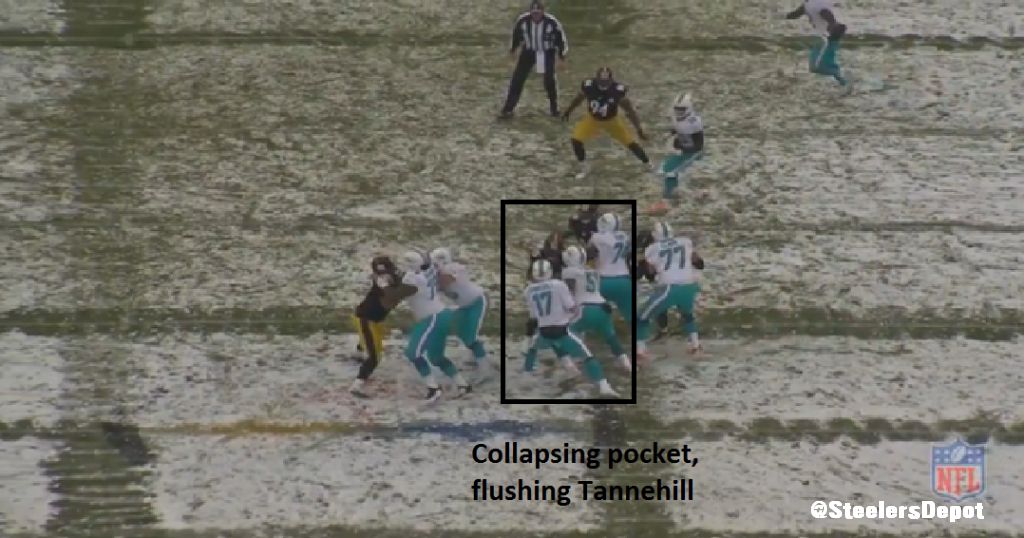
1. 1st and 10, :39 2nd. ROLB but loops to center and puts a jolt in Mike Pouncey. Collapses pocket and flushes Tannehill.
2. 2nd and 10, :32. McKinnie absorbs his bull rush. Nothing doing.
3. 3rd and 6, :27. Just can’t execute on this rush. Makes initial contact, gets low, trying to knock hands away. Just couldn’t get around the tackle. Ball out quick so bit of a moot point.
Fifth Drive
Snaps: 4
Run: 2
Rush/Drop: 2/0
Play-by-Play
1. 1st and 10, 8:05 3rd. Draw to the right. Good backside pursuit/hustle, helps make the tackle.
2. 2nd and 4, 7:23. Up the arc too much.
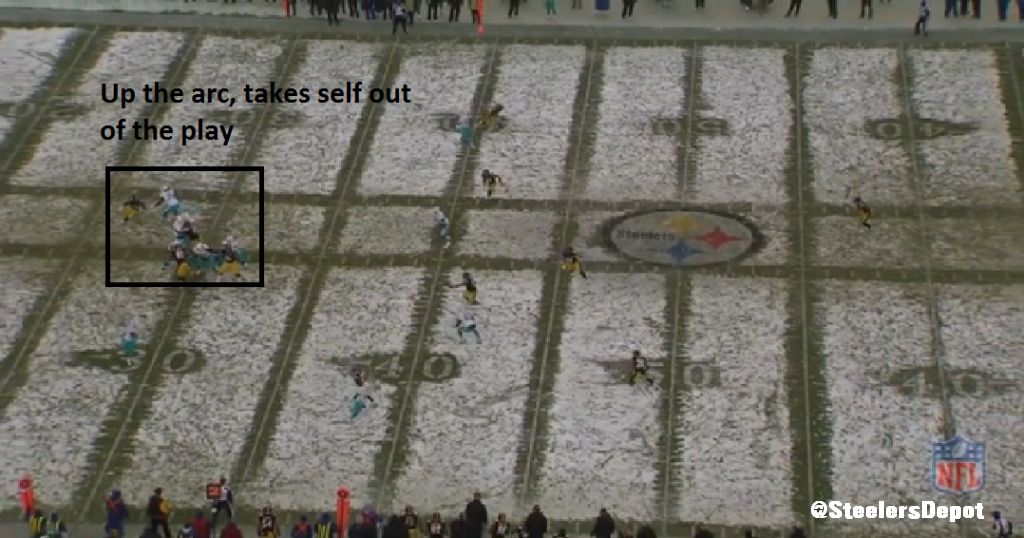
Only going to get pressure at that depth vs seven step drops.
3. 3rd and 4, 7:19. T/E stunt with Cam Heyward. Passed off well by Miami, not much doing.
4. 1st and 10, 7:08. Unbalanced line with Tyson Clabo base blocking him. Locks on and Jones can’t shed until well after the back has passed.
Sixth Drive
Snaps: 1
Run: 0
Rush/Drop: 0/1
Play-by-Play
1. 2nd and 3, 12:46 4th. Playaction, boot to the left. Jones still in pursuit by the time Tannehill fires the ball.
Totals/Conclusions
Snaps: 21
Run: 7
Rush/Drop: 12/2
I actually came away impressed with Jones. The issues that have been plaguing him all year still exist but I won’t beat a dead horse (this time, at least). He’s finally making an effort to show more active hands. Once he gets stronger in the weight room, something that will just come in time, he’ll be able to convert speed to power and ideally, stopped from getting pushed up the arc when he’s nearly won like what happened in the third drive.
His play against the run has seemed to dip some, though and doesn’t look as strong now as he did at points early in the year. Not sure of the explanation for that.
As I’ve noted before, the team has appeared to simplify his assignments, asking him to drop into coverage a lot less. Lets him play a little bit faster and keep trying to grow as a pass rusher (1 sack in 12 games and that came working against a running back).