By Alex Kozora
A breakdown of Mike Adams’ snaps versus the Oakland Raiders.
CLICK ON ANY PICTURE TO ENLARGE
First Drive
Snaps: 1
Run/Pass Block: 0/0
Pass Route: 1
Play-by-Play
1. 2nd and 10, 14:36 1st. Reports as an eligible receiver at RT. Runs a drag route. Don’t know why he would be asked to do that. Would rather with David Paulson or Michael Palmer. Still can show the Heavy run first look.
Second Drive
Snaps: 1
Run/Pass Block: 0/1
Play-by-Play
1. 1st and 10, 6:41 1st. Eligible receiver at LT. Fakes zone run (high hat though) with Ben Roethlisberger rolling to the right. No one to block because of that.
Third Drive
Snaps: 3
Run/Pass Block: 1/2
Play-by-Play
1. 1st and 10, 15:00 3rd. Eligible at RT. Double teams LaMarr Houston with Marcus Gilbert and pushes him upfield. Run off tackle to the left though.
2. 1st and 10, 8:54. Eligible RT. Pass set with OLB engaging and then dropping into coverage.
3. 2nd and 10, 8:48. Eligible RT. Screen to Le’Veon Bell. Sticks at second level and holds it for a few moments before falling off. Decent play though, showed strength/leg drive to stick initially at least.
Fourth Drive
Snaps: 2
Run/Pass Block: 1/1
Play-by-Play
1. 2nd and 5, 3:40 3rd. LT filling in after David DeCastro’s injury. 66 was in for two plays after suffering the injury but hobbled around and clearly needed to come out. Solo down block on DT. Good push, leg drive, and showed his strength.
2. 3rd and 5, 3:05. Quick throw so no pressure. But still not dropping his butt, back at 45 degree angle.
Fifth Drive
Snaps: 2
Run/Pass Block: 0/2
Play-by-Play
1. 1st and 10, 14:24 4th. Smoke screen to Antonio Brown with Adams as lead blocker. Can’t get legs under him and LB falls off block. But a tough block with the LB changing directions as soon as Adams makes contact so hard to be critical.
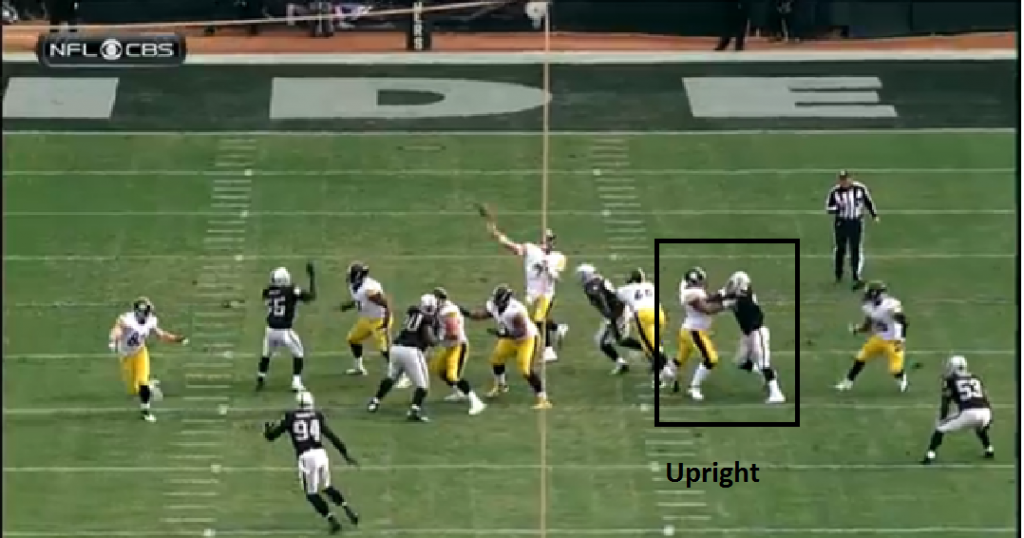
2. 2nd and 7, 14:00. Chip from Bell working against Houston. Adams gets completely upright, walked back. Zero leverage. Play starts really getting ugly from here.
Sixth Drive
Snaps: 3
Run/Pass Block: 0/3
Play-by-Play
1. 1st and 10, 13:01 4th. Quick throw. Houston still low man and Adams exposes his chest.
2. 2nd and 10, 13:06. Shovel pass. Adams works to the MIKE at the 2nd level but no one in the area.
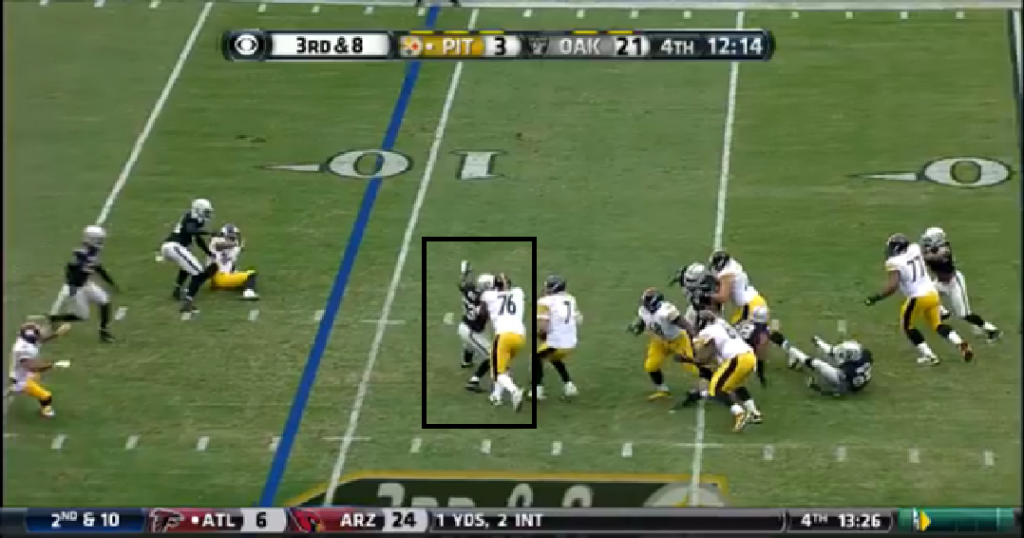
3. 3rd and 8, 12:59. Shows decent lateral movement, shoving Nick Roach out of the way as he counters inside. Kept Ben clean for the moment.
Seventh Drive
Snaps: 3
Run/Pass Block: 0/3
Play-by-Play
1. 1st and 10, 10:34 4th. Houston with bull rush because he knows he’ll win (surprise! He does). Screen though so the ball comes out quick.
2. 2nd and 12, 10:04. Stunt and Adams does pick up the DT slanting to him. But sheds the left tackle, bringing Ben down as he climbs the pocket. Tough to stop for Adams but sack still on him.
3. 3rd and 15, 9:26. Stunt with the DT on contain. Nothing doing.
Eighth Drive
Snaps: 3
Run/Pass Block: 0/3
Play-by-Play
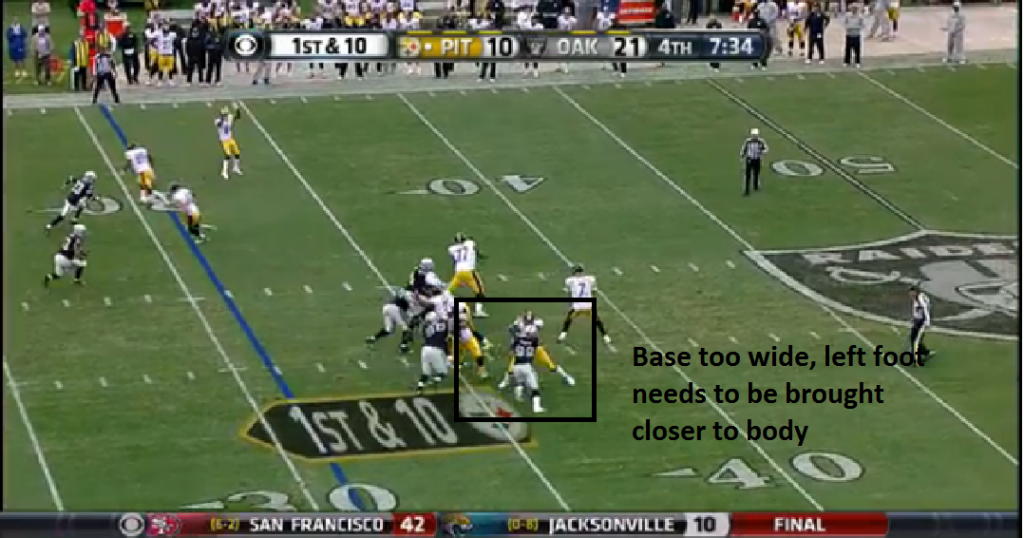
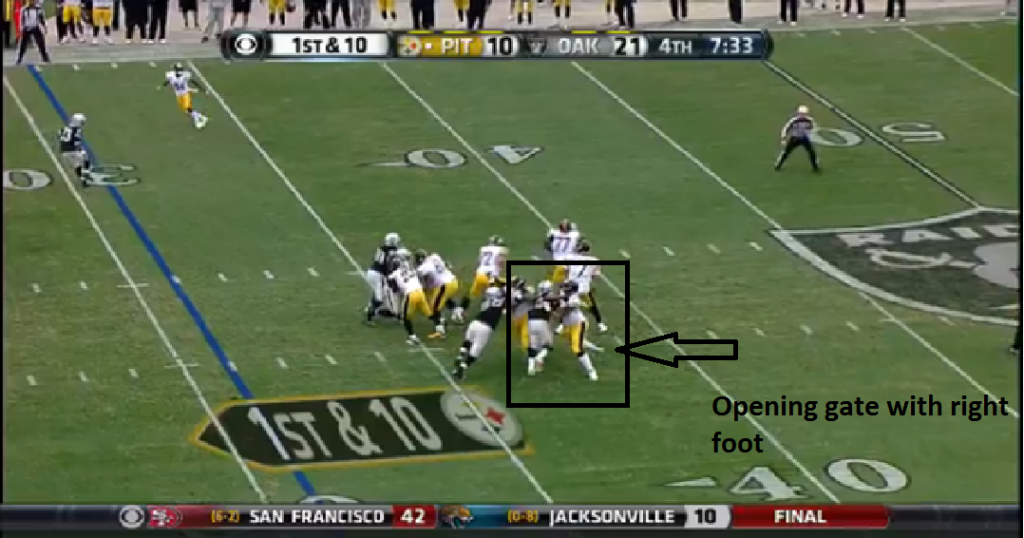
1. 1st and 10, 7:34 4th. Houston in two point stance. Adams’ base is consistently too wide. One of the major technical flaws in his game. Should be about shoulder width. They’re not. Lose balance, lateral movement with a base that’s too wide. Then he opens the gate with his right foot and Houston drives through. U-G-L-Y
2. 2nd and 3, 6:56. T/E stunt picked up well by Wallace and him. Adams still gets upright, however.
3. 3rd and 4, 6:52. Solo pass block on DT with overload blitz coming from other side. Not much to note.
Ninth Drive
Snaps: 14
Run/Pass Block: 3/11
Play-by-Play
1. 1st and 10, 4:22 4th. Tad slow off the snap but able to push Houston up the arc.
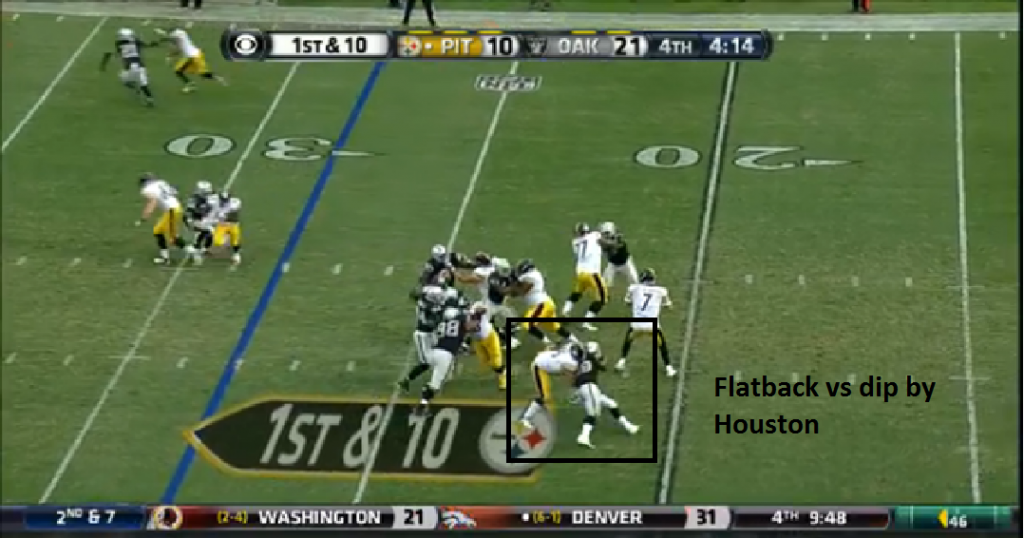
2. 1st and 10, 4:15. Flatback vs dip. Strength and the fact Houston can’t use his hands are the only reasons Adams able to seal Houston just enough.
3. 2nd and 10, 4:11. Houston initial outside rush but counters inside.. Adams not even able to come close to mirroring. Simply burned.
4. 1st and 10, 3:45. DT slants outside but on contain. Nothing doing.
5. 1st and 10, 3:13. Adams again upright vs bull rush but strength good enough for him to hold on for dear life.
6. 2nd and 10, 3:08. Heath block/release on Houston. Houston throws an arm into Adams, gets the tackle’s leg into the air, and runs through him.
7. 3rd and 1, 2:44. Solo run block with the FS in the box. Obviously wins this battle and finishes the play which was good to see. Lost art for lineman these days.
8. 1st and 10, 2:10. Play I showed in my sack breakdown so I won’t go into too much detail here. But Houston with the swim, Adams whiffs on his block and doubles over. As a last resort, he dives and grabs onto the foot of the end. Can’t make this stuff up.
9. 2nd and 10, 2:00. Stunt he does recognize and drives the LB into the ground.
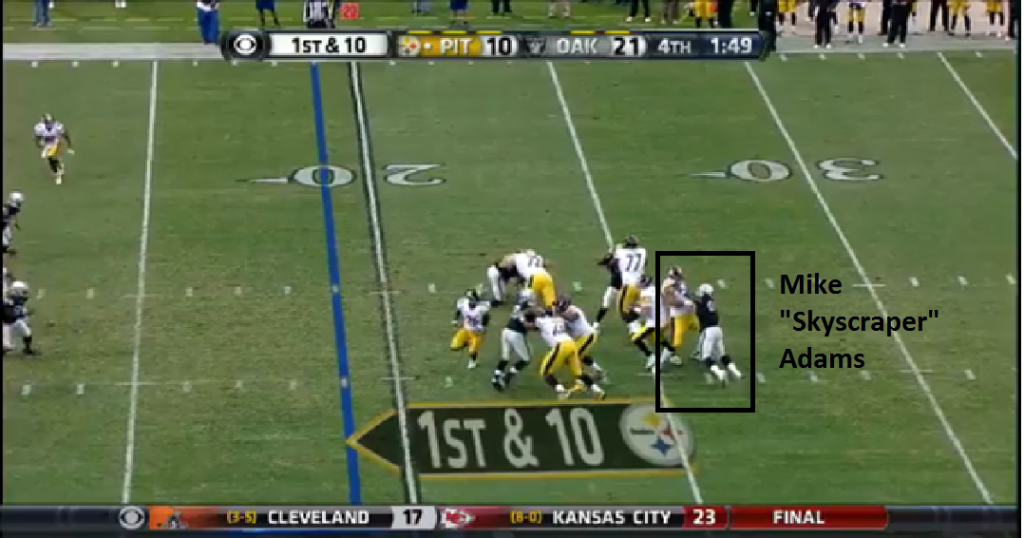
10. 1st and 10, 1:51. Houston gets him upright again in his pass set.
11. 2nd and 3, 1:43. Bullrushed. Upright. Barely holds ground. Lather, rinse, repeat.
12. 1st and Goal, 1:36. Overload blitz, Raiders bring more (6) than the Steelers can block (5 – in empty set). Adams does smartly take on the inside rusher so there’s that.
13. 1st and Goal, 1:27. Tries to get to the second level on the Bell TD but falls off Kevin Burnett.
14. Two Point Conversion, 1:24. Not much doing on the end around away from him.
Total/Conclusions
Snaps: 32
Run/Pass Block: 5/26
Pass Route: 1
I think I’ve made my feelings of his performance clear in what’s written above. There’s an obvious pattern. I never watched Adams too closely at Ohio State, but if I had to guess, he was getting by because of his strength. There’s no technique to his game. His base is too wide, he can’t sink his butt and get low, and the only time he isn’t upright is when he’s doubled over. The upper body strength he possesses is fairly unique but without any other tools in the toolbox, it’s practically useless. Technique can usually be fixed but as chronic as this is, I don’t think it ever will be.